

If you are looking to up your photography game, there are multiple areas you can look at that will help you capture better photos of your finished projects.
Chris Major, founder and lead photographer of CM Images, LLC, says that photography can be particularly powerful if you want to land more high-end jobs. The quality of your project photos can also play a major factor when you enter for industry awards.
Consider Your Composition
Major says the composition of the shot is the biggest key to taking quality landscape photos. This is the intentional arrangement of the picture and what directs the eye.
One tip is to not try to cram every element of the landscape into each shot. Major says while a wide hero shot is good, it shouldn’t be the only perspective you focus on.
“To me, it’s about how can we isolate some of these areas so that they can be on their own because they were chosen to be in the design and then built for a certain reason,” Major says.
Understanding the story you want to tell with your pictures will also help you determine which sections of the landscape to focus on.
“We want our clients to envision themselves in the space so that they can experience this opportunity,” Major says. “That they can make it their own. We want that in our images.”
Sometimes this is achieved simply by turning the camera slightly to leave certain elements out of the frame. Another way to determine the focus is to adjust the depth of field so certain components are not in focus.
Utilizing leading lines or arranging the shot with the rule of thirds can also help pictures look more dynamic as they help guide the eye.
“Another way to consider the dynamic look is something where you have to consider an angle that is different than what you might normally be looking at,” Major says. “Everything that we see is between four and six feet up and straight on ahead. Well, sometimes we can create something dynamic by getting high and then looking down.”
Major does caution against choosing angles that might create a distorted perspective, which can become distracting.
Clean Up the Site
Major says the most overlooked aspect of landscape photography is remembering to clean the site up before the shoot.
“I know that seems really silly, and it seems like, ‘Oh, isn’t it obvious?’” Major says. “Honestly, I have walked onto sites where I’ve been told it’s ready, and it is nowhere near ready.”

Preparing the property includes everything from straightening patio furniture and blowing leaves off the patio to wiping down light fixtures.
“Wiping down a light fixture doesn’t seem like that big of a deal, but it also is very overlooked,” Major says. “One thing that a lot of people don’t think about is that spiders really like light fixtures. You know what spiders really like to make are webs, and you know what shows up really obvious on a night lighting shot is spider webs.”
Major recommends creating a checklist of everything your team should address on a property before a photoshoot.
“Some contractors that might think, ‘I’m not putting this on the cover of a big magazine or anything like that,” Major says. “But your customers, they are consuming content that looks beautiful. So, when they see something that isn’t at that level, then they’re probably going to mentally categorize you as maybe not at the level in which they think you should be.”
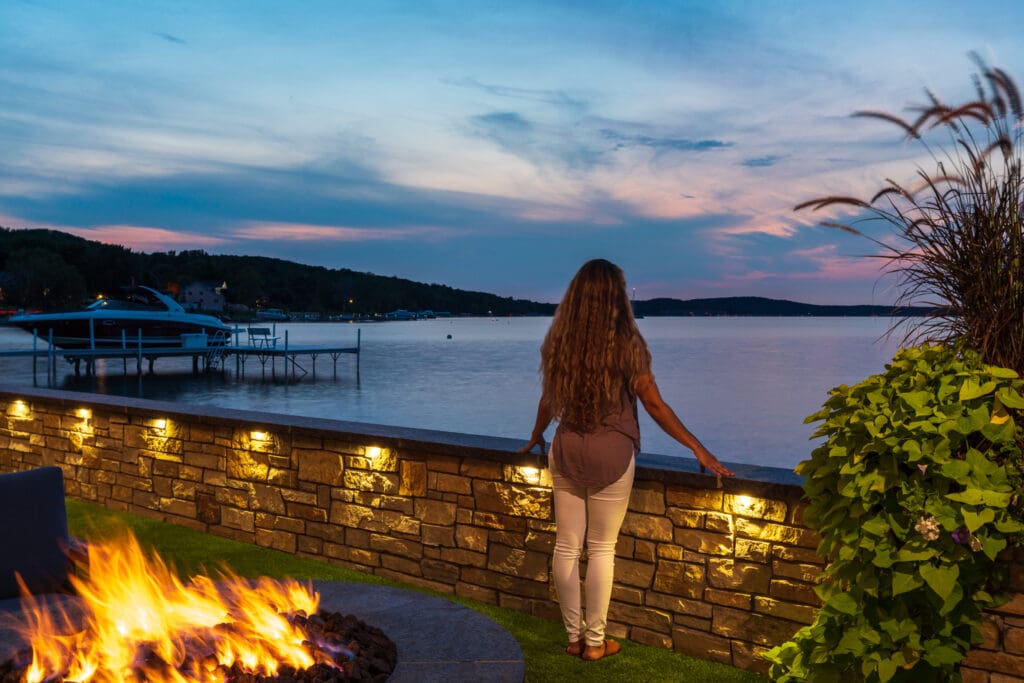
Pay Attention to Lighting
Major says instead of worrying about when is the best time to do a photoshoot, be mindful of when it’s not the best time to take pictures.
“There are a lot of opportunities to capture great images of a landscape when it’s morning, when it’s evening, when it’s dusk, when it’s maybe even pitch black, but the times where I would probably avoid would be in that 10 to three o’clock timeframe,” Major says.
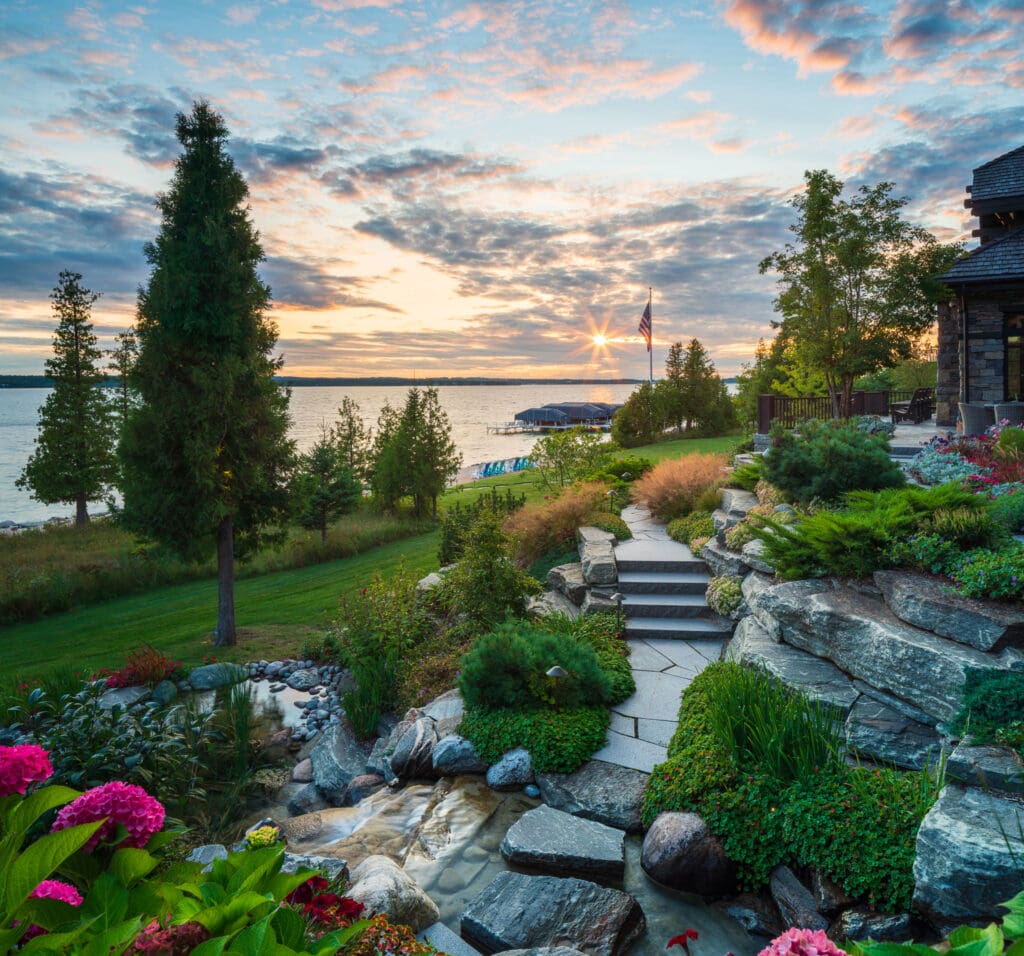
He explains that this window of time is when the sun creates deep shadows and bright highlights. The only time it is feasible to shoot during this time period is if the sky is overcast.
On the flipside, the golden hour is a very flattering time to take pictures, but if it is overcast, pictures taken during this time can come out looking flat and dull.
Major says it really comes down to what you are shooting that determines the best time to photograph certain sites. For instance, it isn’t a good idea to shoot a property deep in the woods in the early morning or late evening, as it will typically be too dark.
He recommends talking to whoever has been on the site the most to gain insights on what part of the day the landscape looks its best.
Adapt to Weather Challenges
Landscape photography is often at the mercy of Mother Nature, but Major says that even bad weather can create great photos.
In one instance, Major says he ended up doing a photoshoot with a thunderstorm in the vicinity and the light coming through the clouds made the images appear very dramatic and moody.
“We have to work with the weather that’s given to us,” Major says. “It’s not always ideal and it’s up to me as a photographer to try to help guide them through that process, to be like, ‘Okay, well, this is going to probably produce a great photo,’ or ‘Actually, it’s going to be a total deluge, and we got a bag it.’”
Don’t Forget to Edit
Major estimates it takes double the amount of time spent on the shoot to finish editing the pictures. The cleanliness of the site during the photoshoot will also speed up or slow down the editing process.
“Almost all the time I do some sort of touching, I will edit almost every single photo that I will put out there,” Major says. “If I deliver a photo, it’s definitely been touched in one way, shape or form.”
Some of the elements to consider when editing include adjusting the white balance, cropping the image for a tighter composition, or Photoshopping out distracting objects.
“You have to take the time to make it look right, or else you’re going to run the risk of either not using the photo at all or not having something very good to deliver,” Major says.
Key Takeaways
- Use framing techniques like rule of thirds, leading lines, and unique angles to create dynamic images while keeping distractions out of frame.
- Clean and stage the property before shooting, down to details like arranging patio furniture and cleaning light fixtures, to ensure professional-quality results.
- Avoid the midday sun. Strive to capture photos during morning, evening, or golden hour, while adapting to the site’s unique conditions.
- Editing is essential. Adjusting white balance, cropping, and removing distractions takes time but ensures polished, usable images.