
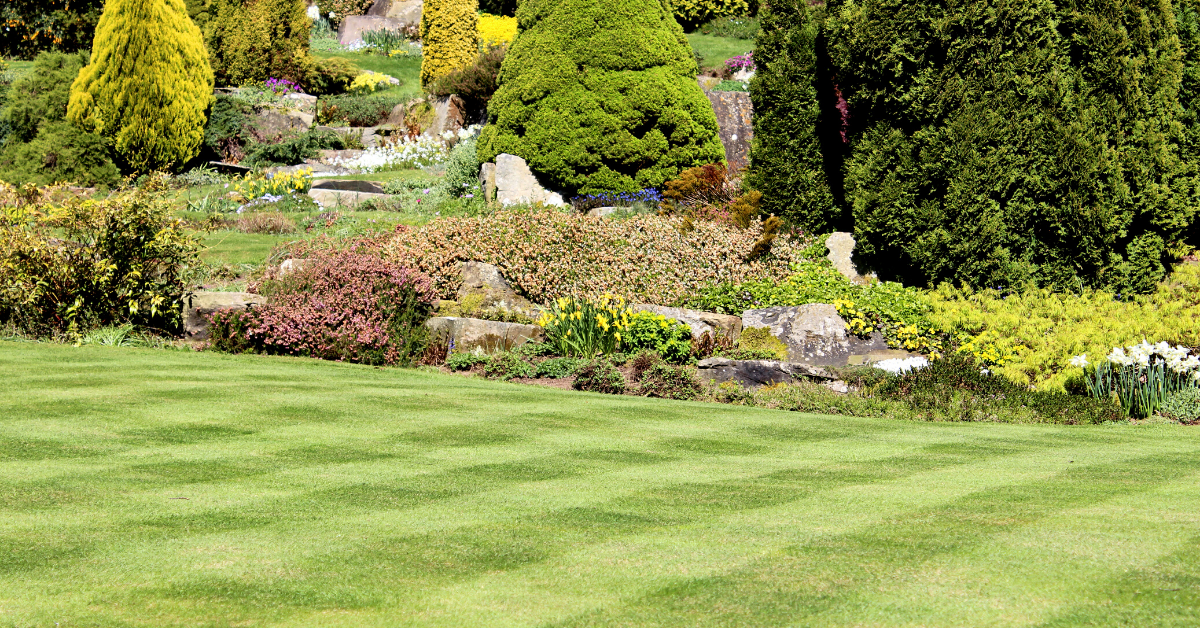
Sports fields are often known for their lush swaths of green grass with perfect stripes or mowing patterns. However, mowing patterns aren’t limited to just athletic fields. You can make your client’s property the envy of the neighborhood with the right steps.
Lawn striping can be used to accentuate certain parts of the property or create a more uniform look. Aside from the aesthetics, mowing patterns also minimize damage to the lawn. By switching up your cutting patterns you can prevent tire tracks and compacted grass from occurring. Also, because the intensity of the stripe is dependent on the grass blades being longer, the lawn will be healthier as you cut less than one-third of the turfgrass at a time. Grass that is allowed to grow tall can develop a strong root system that can withstand dry periods better.
How It Works
While a perfectly striped lawn may look like the different colors are caused by different types of turfgrass or different mowing heights, it really comes down to light. The varying appearances all depend on the light reflecting off the blade of grass at a different angle.
When the blades of grass are bent away from you, they appear lighter in color because there is more surface area to reflect the light. Meanwhile bending the blades toward you make the grass appear darker as only the tip of the grass is reflective.
As mentioned earlier, a taller mowing height gives the grass blades more flexibility to bend. The grass type also factors into lawn striping, as cool-season grasses bend easier than warm-season grasses.
This doesn’t mean warm-season grasses can’t be striped, but they do call for a striping kit or a lawn roller. Lawn rollers can intensify the stripe by bending the grass farther. The position of the sun will also affect how striking the pattern will appear. These patterns should be alternated after every two-week period so the grass doesn’t lie flat in one direction.
Types of Mow Patterns
Stripes – This is the most straightforward design and can hide irregularities in the lawn. Start by mowing the perimeter and then determine the direction you want the stripes to run. Work your way back and forth making Y turns at the end of each row. Going over the perimeter once you’re finished will provide a clean look.
Checkerboard – a more time-consuming pattern, the checkboard is created by mowing stripes either horizontal or vertical on the property. Then create a second set of stripes perpendicular to the first pattern. Again, going over the perimeter for a final pass will clean up the edges.
Diamonds – Another pattern that starts with the base of stripes. Once the first set is complete, make your second set of stripes by mowing diagonally from end to end.
Zigzag– To create a zigzag stripe pattern, first create a checkerboard or diagonal pattern on the lawn. This serves as the template for your pattern. Select a “light” stripe towards the center of the checkerboard area and travel across one of the “dark” stripes and onto the next “light” stripe. While on the “light” stripe, turn the mower 90 degrees to the right. Mow the next “dark” and “light” stripes before turning the mower 90 degrees left. Repeat this as you move across the area.
Depending on your skill level, you can take these mow patterns even further if you have the time and client who really wants a wow factor in their yard. The Ground Guys advise sketching out your pattern on paper before starting and shading every second row to assist with visualization.