
As the end of the year draws near, so does the start of snow and ice management season. One simple task to help set your team up for success is to conduct regular maintenance on your snow removal equipment, including snow blowers, well before the winter months.
AccuWeather predicts that most areas in the Northeast will receive more snow this season than last year as well as in Minnesota, Wisconsin and Michigan, so it’s important to prepare now.
Wes Bollingmo, channel & product support manager at Toro, says that snow blower maintenance is the key to ensuring your investment holds up for years to come.
“Not only can proper maintenance extend the life of their snow blower, but it can reduce the chance that serious repairs pop up in the middle of the season, costing them money,” Bollingmo says.
Common Maintenance Issues and Causes
Below are some of the main issues you can expect to encounter and what’s causing them.
Snow Blower Not Starting
The biggest issue you can encounter is when your snow blower will not start. This is more common with gas-powered blowers. Bollingmo outlines how to assess what is keeping the blower from starting.
If you have a two-stage snow blower, open the fuel shut-off valve. Insert the ignition key before pressing the primer bulb. Press it a couple of times if it’s 15 degrees or warmer. Press the primer bulb four times if it’s below 15 degrees.
Then rotate or pull the choke to the ‘on’ position and move the throttle to the ‘fast’ setting. If the snow blower has an electric starter, plug in an extension cord now. Depending on the model, either pull the recoil starter or press the electric starter button to get the snow blower running.
Once the snow blower has started and warmed up, move the choke to the run position.
Bollingmo says the choke should be closed when starting the snow blower. Close it fully for cold conditions or when the engine is cold. When the weather is 30 degrees or above, leave it half or three-quarters open.
He says there’s no need to close the choke if you restart the snow blower less than five minutes after the engine was shut off. If it’s been longer than five minutes since the engine was running, close the choke and press the primer bulb like with a normal start.
If gas fumes are noticeable while starting, the snow blower may have been overprimed and now the machine may be flooded. Close the fuel shutoff if the machine has one. Shut off the choke and pull the recoil three times to move excess gas out of the engine. Wait 15 minutes before starting it again. If there is a fuel shut-off valve, it needs to be opened again when restarting.
Bollingmo says if the snow blower still doesn’t start, there might be another issue going on. Check your manual or talk to a local dealer for further troubleshooting.
Stale Fuel in Tank
Bollingmo says the common culprit for a snow blower engine not starting is stale fuel. This can leave harmful deposits that clog the fuel system and potentially affect the performance of the snow blower.
“A good rule of thumb is to only purchase the gas expected to be used within 30 days,” he says. “If the gas may be in the machine longer than that, a fuel stabilizer should be added when fueling to prolong its lifespan up to six months. Old gas can leave harmful deposits that gum up the snow blower’s fuel system.”
Bollingmo says if you spot old fuel in a snow blower, the tank should be drained. Because this is a flammable substance, it is recommended to do this process outside on a flat surface. Disconnect the fuel line and let the gas flow into a catch pan or other container.
“It is important to note that landscapers should not run the engine to empty the fuel tank in this situation, which can cause more damage to the engine if the fuel is old,” Bollingmo says. “Since the fuel that was left in the machine is more than likely going to cause damage to the carburetor, a landscaper should clean or replace the carburetor.”
Battery Not Holding Charge
While electric snow blowers need less maintenance than gas-powered models, you still need to monitor the overall battery health.
“An easy way to know if the snow blower’s batteries are holding a full charge is to invest in a digital multimeter,” Bollingmo says. “These can be used as often as the landscaper likes to check that the voltage is within its recommended range.”
Bollingmo recommends running routine run-time tests. Track how long the battery runs in ideal and heavy conditions at the start of the season and compare it to the snow blower’s performance throughout the season.
Battery degradation can be controlled by properly storing and charging.
“Lithium-ion batteries need to be stored in a cool and dry environment,” Bollingmo says. “Extreme temperatures, both hot and cold, can negatively impact battery performance and lifespan. They can also lead to reduced capacity, increased self-discharge rates and potential damage to the battery cells.”
Clogged Chute or Auger Won’t Turn
Another common issue to look for is a clogged chute. Bollingmo says wet or heavy snow can easily clog a chute if it is not cleared after each use.
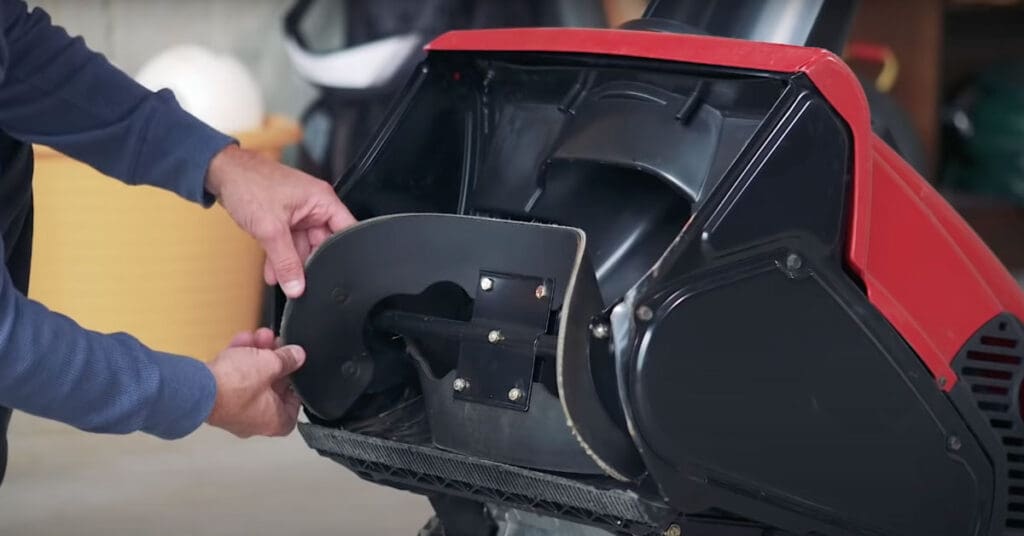
If the auger won’t turn, there’s typically a problem with parts like worn-out drive belts or other loose/broken parts. Bollingmo says missing or damaged shear pins could also be the cause of the auger issues.
“These shear pins act as safety devices to protect the auger and gearbox from damage due to big chunks of ice or rocks. Make sure those pins are replaced before each use,” he says.
Bollingmo says that shear pins wear out the fastest, but they’re designed to. Auger and traction drive belts can also stretch, crack or become worn down if the snow blower experiences heavy use for extended periods.
“Without these important parts, the snow blower won’t be able to move or churn the auger,” Bollingmo says. “It is important to note that when replacing a belt, landscapers should check the tension. Loose belts can slip, and too-tight belts may wear out faster.
General Safety Practices
When performing any maintenance on your snow blower, make sure the machine is on a level surface and the engine is off. Make sure all moving parts have stopped and the blower has had time to cool down.
Wear eye protection when performing any adjustments or repairs to protect the eyes from objects being thrown by the machine. Bollingmo advises checking fasteners frequently for proper tightness.
Do not change the governor settings on the engine and only purchase genuine manufacturer parts and accessories.
When in doubt, call a dealer to help diagnose any mechanical issues or to repair the machine.
Storing Snow Blowers for Next Season
After a successful snow removal season, conducting a few simple steps can help reduce the likelihood of issues the following year.
Step 1. Drain the fuel system
Step 2. Change the engine oil
Step 3. Inspect cables, rotor blades and scraper
Step 4. Protect from rust — especially in humid summer months
Step 5. Review the off-season storage section of the owner’s manual